If you’ve been gaming on a Nintendo Switch long enough, you’ve probably felt it: that unmistakable creep where your character walks diagonally without you touching the stick, or the camera drifts mid-game. Nintendo Switch joystick drift has become almost legendary in gaming communities, a persistent hardware issue that’s plagued the platform since the original launch in 2017. Whether you’re a casual player powering through story games or a competitive gamer grinding ranked matches, a faulty joystick can kill your experience fast. The good news? You’ve got options. This guide walks you through diagnosing the problem, fixing it yourself, navigating Nintendo’s official repair system, and knowing when third-party replacements make sense. We’ll break down exactly what’s going on with those Joy-Cons, what you can do about it, and how to prevent it from happening again.


Key Takeaways
- Nintendo Switch joystick drift is caused by microscopic debris accumulation and potentiometer wear inside the analog stick, not a traditional manufacturing defect, but a design limitation that worsens with use and environmental factors.
- Diagnose joystick drift using Nintendo’s built-in calibration test in System Settings, which reliably shows drift direction and severity before pursuing repairs or replacements.
- Recalibration and careful isopropyl alcohol cleaning are free DIY fixes worth attempting first for mild drift, though they work best when drift is fresh and physical wear isn’t advanced.
- Nintendo’s official repair costs $35–45 per Joy-Con out of warranty with a 2–3 week turnaround, while third-party Hall Effect controllers from brands like 8BitDo offer comparable or lower prices with significantly better long-term stick durability.
- Hall Effect joystick technology in third-party controllers eliminates traditional drift risks and has become the standard for competitive players, making them a smarter long-term investment than repeatedly replacing official Joy-Cons.
- Regular preventative maintenance—avoiding aggressive stick movements, keeping controllers dry and cool, cleaning edges every few weeks, and proper storage—can extend Joy-Con lifespan from 800 to 1200+ hours before drift becomes noticeable.
Understanding Nintendo Switch Joystick Drift and Common Issues
What Is Joystick Drift?
Joystick drift is the term for when your analog stick registers movement even though you’re not touching it. It shows up as unintended character movement, camera panning, or menu navigation without input. On the Switch, this typically affects the left or right Joy-Con (or both), though the Pro Controller can experience it too. The stick itself usually looks and feels normal, there’s no visible damage or sticking, which is what makes drift so frustrating. You can be sitting still with your hands off the controller and watch your in-game character walk backward.
Drift can range from barely noticeable (your cursor drifts a pixel or two per second) to severe (your character sprints in a direction constantly). Some players notice it first in the menus: others spot it immediately in-game, especially in precision-heavy titles like The Legend of Zelda: Breath of the Wild or Super Smash Bros. Ultimate. The more sensitive the game is to analog input, the sooner you’ll catch it.
Why Does Drift Happen?
The root cause boils down to wear and tear on the potentiometer, a sensor inside the joystick that measures how far you’re tilting the stick. Nintendo’s Joy-Con joysticks use a design that’s been criticized for not aging well. As you play, microscopic debris (dust, skin cells, whatever gets in there) accumulates inside the stick mechanism. Combined with regular friction and the rubber conductive material that tracks your input gradually wearing down, the sensor loses accuracy. Eventually, it reports movement when there isn’t any.
It’s not a manufacturing defect in the traditional sense, it’s a design limitation that shows up with sustained use. Some Joy-Cons drift after 200 hours: others last 1000+ hours. It’s largely the luck of the draw, though aggressive play styles and environmental factors (dusty rooms, heavy usage) speed up the process. Nintendo has faced multiple lawsuits over this issue and, while they’ve made quieter improvements in newer Joy-Con batches, it remains a widespread complaint even in 2026.
Other Common Joystick Problems Beyond Drift
Drift gets the headlines, but it’s not the only joystick issue you might encounter. Stick responsiveness lag means the stick responds slowly to input or feels sluggish, different from drift, but equally annoying in fast-paced games. Your character might take a half-second longer to turn or react.
Dead zones are areas where you can tilt the stick without any in-game response. You might tilt slightly and nothing happens until you push further. This is especially brutal in games requiring precise aiming or camera control.
Clicking or grinding noises when you move the stick usually indicate internal wear or something loose inside. The stick still works, but it sounds rough and feels different from how it did fresh out of the box.
Stick button failures (pressing down on the stick, common in Mario Kart 8 for drifting) can stop registering presses, either intermittently or completely.
Each of these has slightly different causes and fixes. Some respond to recalibration: others need physical repair or replacement. We’ll cover diagnosis and fixes for all of them in the sections below.
How to Diagnose Your Joystick Problems
Built-In Calibration Tests
Before assuming your Joy-Con is dead, run Nintendo’s built-in diagnostic. Head to System Settings > Controllers and Sensors > Test Input Devices. This opens a menu where you can test individual controllers and see exactly what input the system is reading.
Tap on the Joy-Con you want to test, then select the stick test. You’ll see a visual readout, usually a crosshair or circle, that shows the stick’s current position. Physically don’t touch the stick. If the crosshair/circle stays centered, your stick is clean. If it drifts toward a direction or wobbles around, you’ve got drift. The test is surprisingly reliable at showing you exactly how bad it is and in which direction it’s drifting most.
Also test your stick’s full range of motion by pushing it in all directions (up, down, left, right, and diagonals). If you can’t reach certain areas without pushing harder than normal, you might have dead zones. Some sticks need a harder push to register full tilt, that’s a sign of wear.
Run this test multiple times over a few days. Sometimes drift is intermittent (happens only after the controller warms up, or only on certain angles), so you want a clear pattern before deciding on your next step.
Signs You Need Professional Help
If your stick test shows drift but it’s mild and doesn’t affect gameplay, you might get away with recalibration and cleaning (covered in the next section). But, some signs point to internal hardware damage that DIY won’t fix:
Consistent, severe drift that shows up immediately in the test and gets worse over time. If the crosshair is moving rapidly across the screen with the stick untouched, internal damage is likely. Clicking or grinding sounds combined with drift suggest mechanical failure inside the stick module. Complete stick unresponsiveness in one or more directions, even when you push hard, usually means the potentiometer is fried. Intermittent complete drops where the stick suddenly stops registering any input for seconds at a time, then comes back, this is often a connection issue inside the controller that needs professional repair.
If you’re seeing any of these, DIY fixes are worth trying (they’re free), but professional repair or replacement is your likely end goal. The sooner you accept that, the sooner you can get back to gaming. Holding onto a dying controller hoping it’ll fix itself usually just extends your frustration.
DIY Fixes and Maintenance Tips
Recalibrating Your Joy-Cons
Recalibration is the first thing to try, it’s free, takes two minutes, and sometimes actually works. Go to System Settings > Controllers and Sensors > Calibrate Control Sticks. The system will ask you to perform specific stick movements: full rotations, pressing in all directions, and returning to center.
Do this slowly and deliberately. Don’t slam the stick around: move it smoothly through the full range. The system uses this data to “relearn” what your stick’s neutral position and full range should be. If your stick has drifted slightly due to software calibration drift (not physical damage), this can reset it.
Recalibration works best on fresh drift that just started appearing. If you’ve been dealing with it for weeks or months, the physical wear is probably too far along for this alone to help. But it’s always worth trying first, and you can repeat it as needed without any risk.
Cleaning Your Joysticks Safely
Microscopic debris inside the stick mechanism is a major drift culprit. Careful cleaning can sometimes improve performance, especially if drift is mild.
What you need: Isopropyl alcohol (90% or higher concentration is ideal), cotton swabs or thin brushes, and patience.
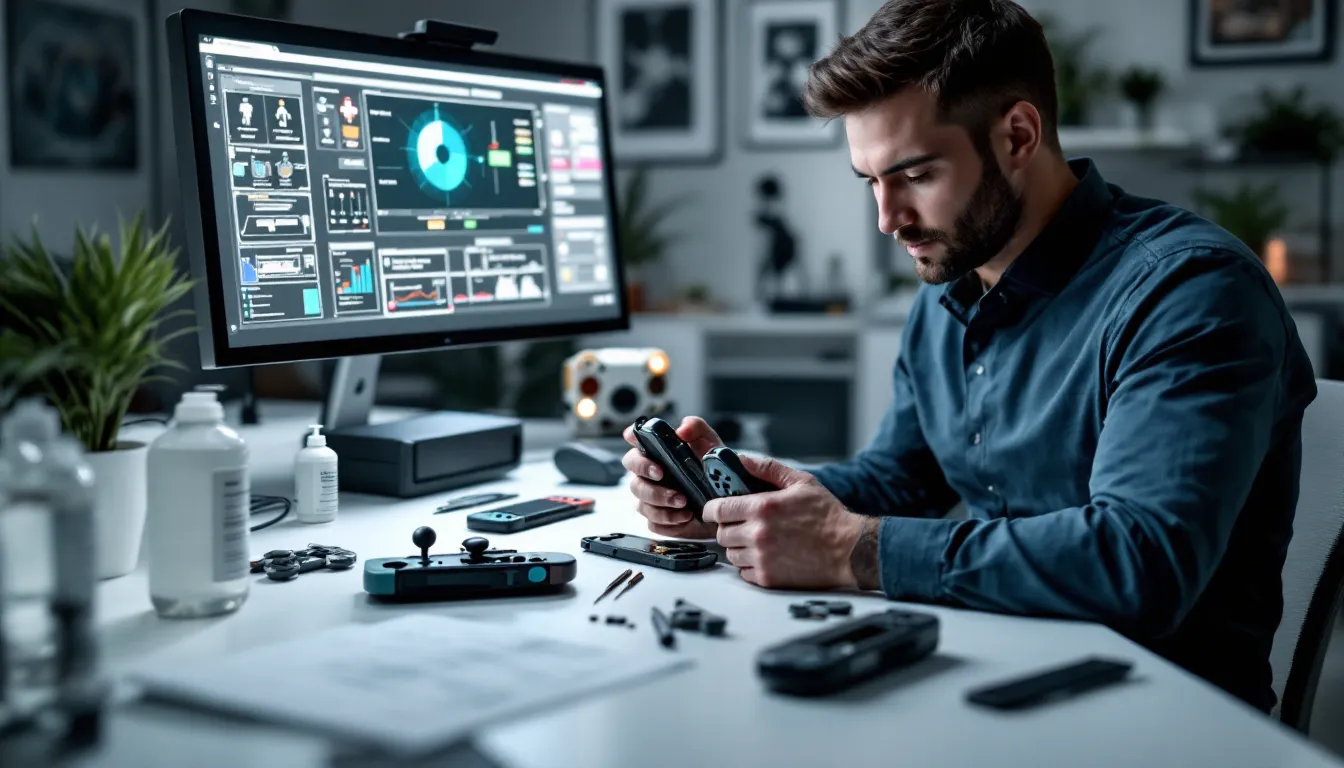
The process: Detach the Joy-Con from your Switch. Apply a small amount of isopropyl alcohol to a cotton swab, not dripping wet, just damp. Gently move the swab around the edges of the joystick, where the rubber meets the plastic casing. Work it into the seams carefully. Tilt the Joy-Con in different directions while doing this so the alcohol works down into the mechanism. Repeat with a dry swab to remove excess moisture. Let it air-dry for at least 30 minutes before reattaching and testing.
Do not try to force the stick apart or disassemble the Joy-Con unless you’re comfortable with electronics repair and have watched detailed guides. You can damage the ribbon cables or potentiometer itself, making things worse. Stick with the external cleaning approach.
If you want to be more aggressive, some gamers use compressed air to blow out debris. Hold the can upright (never shake it), and use short bursts around the stick edges. The cold air can temporarily improve performance, but it’s a temporary fix at best.
Cleaning helps most when combined with recalibration. You’re not “fixing” the stick, just removing the stuff that’s gotten in the way. If the stick is physically worn inside, cleaning won’t bring it back to life permanently.
Firmware Updates and Software Solutions
Nintendo occasionally releases system updates that improve controller stability or introduce new calibration options. It’s rare that an update specifically fixes an individual Joy-Con that’s already drifting, but it’s worth checking that your Switch is fully updated.
Go to System Settings > System > System Update and download any pending updates. Reboot and test your stick again. Some players report that newer updates occasionally improve drift, though this is inconsistent.
Some third-party games have their own controller sensitivity or dead zone settings that can help compensate for minor drift. If you’re playing Mario Kart 8 Deluxe, for example, you might adjust controller settings in-game to increase the dead zone threshold, making the stick less responsive to tiny inputs. This is a band-aid solution, it doesn’t fix the stick, but it might let you keep playing without frustration while you arrange a proper fix.
The GameFAQs Switch: How To Use GameFAQs For Nintendo Switch database often has community-sourced workarounds and game-specific settings if you’re looking for quick fixes in specific titles.
Official Nintendo Repair and Warranty Options
Warranty Coverage and Eligibility
Nintendo’s standard warranty on Joy-Cons is one year from purchase. If your controller is within that window, you’re eligible for free repair or replacement, even if the drift damage isn’t technically a defect, Nintendo has been fairly generous with Joy-Con warranty claims in recent years due to the widespread drift issue.
The trick is having proof of purchase. You’ll need a receipt or order confirmation showing the purchase date. If you bought it at retail and kept your receipt, great. If you bought it digitally (eShop credit) or from a marketplace seller, it gets trickier, you might have an email confirmation or digital receipt.
If your controller is out of warranty (over a year old), you have two paths: pay for out-of-warranty repair, or buy a replacement. We’ll cover both below. Note that Nintendo has faced enough backlash about Joy-Con drift that they sometimes repair out-of-warranty controllers for free, especially if the customer is persistent or the drift is severe. It’s worth asking.
The switch between in-warranty and out-of-warranty is a hard line. One day after your year is up, you’re paying. Plan ahead if you know your controller is aging.
How to Send Your Joy-Cons for Repair
You can’t walk into a Nintendo store and hand them a Joy-Con (though some Best Buy service desks will accept them). You have to go through Nintendo’s online repair portal or call their support line.
Online: Nintendo’s support site and navigate to “Request a Repair.” You’ll need to create or log into your Nintendo account. Select “Joy-Con,” describe the issue (select drift from the dropdown), and provide your serial number. The serial number is on the back of the Joy-Con itself, a small code like “HAN-003.” You’ll get a prepaid shipping label via email, pack up your Joy-Con(s), and send them in.
By phone: Call Nintendo Support (1-800-255-3700 in the US) and speak to a representative. They’ll walk you through the process and answer questions about your specific situation. This is slower but sometimes results in better outcomes if you’re out of warranty, a human can use judgment.
Be honest about the issue but emphasize how it affects gameplay. “Drift” is the keyword. “Unplayable” or “affects competitive play” can sometimes bump your request up the priority queue.
Don’t send in your controller without a prepaid label, shipping costs can run $5-15 depending on your location, and Nintendo should cover it. Some players have successfully claimed shipping costs on their own dime and gotten reimbursed, but don’t count on it.
Repair Costs and Timelines
As of 2026, Nintendo’s official repair costs are:
- In-warranty: Free (parts and labor covered).
- Out-of-warranty, single Joy-Con: Approximately $35-45 USD (varies by region).
- Out-of-warranty, pair of Joy-Cons: Approximately $70-90 USD.
- Pro Controller repair: Approximately $45-65 USD.
Some regions have different pricing, so check Nintendo Support for your country before committing.
Timeline: Expect 2-3 weeks from the moment you ship your controller until it’s back in your hands. This includes shipping time both ways, plus processing and repair time at Nintendo’s facility. In peak seasons (holidays, major game launches), it can stretch to 4 weeks. If you’re desperate to game before then, you’ll need a backup controller.
Nintendo sometimes offers expedited repair for an additional fee (usually $10-20), cutting the timeline to 1-2 weeks. If you’re out of a controller and can’t wait, it might be worth it. But, many players simply buy a replacement or grab a third-party controller as a backup while they wait.
One thing to note: Nintendo doesn’t repair individual stick modules anymore. If your stick is drift-ridden, they repair the entire Joy-Con. This is why repair costs have remained fairly consistent, they’re replacing substantial portions of the hardware. From a value perspective, if you’re out of warranty and paying for repair, buying a new Joy-Con (or a third-party replacement) is often not much more expensive and nets you a controller with a fresh warranty.
Third-Party Replacement Joy-Cons and Pro Controllers
Top-Rated Third-Party Joy-Con Alternatives
If you don’t want to wait for Nintendo repair or pay Nintendo prices, third-party Joy-Cons are plentiful. As of 2026, a few brands stand out for reliability and player satisfaction:
8BitDo Ultimate Wireless Controller – Not shaped exactly like Joy-Cons but widely respected in the community. Uses premium joysticks (Hall Effect sensors, which don’t suffer from traditional drift), offers excellent build quality, and supports both Switch and other platforms. Price: ~$50-60 USD. Pro: Hall Effect sticks are significantly more durable. Con: Larger and less portable than Joy-Cons.
PowerA Enhanced Wireless Controller – Official Nintendo licensed, budget-friendly (~$40-50 USD), and has acceptable build quality. Joysticks are decent but not Hall Effect, so long-term durability is a question mark. Good for casual players who want affordability. Con: Wired versions only have no rumble: wireless is better but pricier.
nyxi Hyperion Controller – Joy-Con shaped, Hall Effect sticks, around $45-55 USD. Decent build, good reviews from casual players, but less established brand recognition than 8BitDo. Pro: Looks familiar, Hall Effect tech. Con: Limited customer support and warranty.
Hori Split Pad Pro – Licensed by Nintendo, designed for hardcore players, ~$45-50 USD. No rumble or motion controls (trade-off for durability), but sticks are praised for consistency. Great for Smash Bros. and action games. Con: No rumble means some games feel incomplete.
For the Pro Controller replacement, 8BitDo Pro 2 and Hori Pad Pro are the standout third-party picks. Both use Hall Effect sticks, solid build quality, and wide game support.
Quality Comparison: Official vs. Third-Party Options
Official Joy-Cons:
- Pros: Guaranteed compatibility, full rumble and motion controls, 12-month warranty, Nintendo support if something goes wrong.
- Cons: Known drift issues, more expensive ($75-80 for a pair), same design as the problem controllers you’re replacing.
Third-Party Joy-Cons (Budget, e.g., PowerA):
- Pros: Cheaper ($40-50), still Nintendo-licensed, acceptable for casual play.
- Cons: Joystick durability unproven in some cases, limited warranty, not all have rumble or motion controls.
Third-Party Controllers with Hall Effect Sticks (e.g., 8BitDo Ultimate, NYXI Hyperion):
- Pros: Hall Effect technology significantly reduces drift risk, excellent build quality, often better ergonomics than Joy-Cons, lower total cost of ownership if durability holds.
- Cons: Larger/less portable, sometimes lack full feature parity (motion, rumble), smaller brand support if issues arise.
Most players who’ve switched to Hall Effect third-party controllers report zero drift issues after over a year of heavy use. The technology is genuinely more durable. But, if you value official Nintendo support and warranty, you’re paying a premium to stick with official controllers.
For Pro Controller alternatives, the 8BitDo Pro 2 is arguably better built than Nintendo’s official Pro Controller and costs about the same (~$70 USD). Hall Effect sticks, excellent construction, and it’s become the default choice for competitive players who want durability without Nintendo’s typical stick issues.
Budget-Friendly vs. Premium Choices
Budget route (~$40-50):
- PowerA Enhanced Wireless (official license, basic but functional).
- NYXI Hyperion Joy-Cons (Hall Effect, risky brand, but reviews are solid).
- Best for: Casual players, backup controllers, or anyone on a tight budget.
- Trade-off: Smaller warranty, less brand recognition, possible durability questions.
Mid-range (~$50-70):
- 8BitDo Ultimate Wireless (premium build, Hall Effect, multi-platform support).
- Hori Split Pad Pro (licensed, excellent stick durability, no rumble).
- Best for: Players who value durability and don’t mind a different form factor.
- Trade-off: Less portable than Joy-Cons, some features might be missing.
Premium (~$70-100):
- Official Nintendo Joy-Cons or Pro Controller (warranty, full features, Nintendo support).
- 8BitDo Pro 2 (third-party but high-end, Hall Effect, excellent build).
- Best for: Competitive players, those who value brand assurance, or players who need every feature.
- Trade-off: Higher cost, but you’re paying for proven reliability and support.
The We’ve Finally Seen the Thinnest, Leading Nintendo Switch 2 Case article has more details on accessory ecosystems if you’re shopping for multiple upgrades.
If you’re genuinely tired of drift and want peace of mind, Hall Effect third-party controllers (8BitDo, NYXI) represent the best long-term value. You’re paying comparable or less than official Joy-Cons but getting significantly better stick durability. If you need absolute warranty assurance and full feature parity, official Nintendo controllers remain the safe choice, just accept that you might drift again in a year or two.
Preventing Future Joystick Problems
Best Practices for Joy-Con Care
You can’t completely eliminate drift risk (it’s partly a design limitation), but smart handling reduces it significantly. First: avoid aggressive stick movements. While normal gameplay is fine, deliberately slamming the stick side-to-side, clicking it repeatedly under stress, or playing in unusually dusty or sandy environments speeds up wear. If you’re a competitive Smash Bros. player executing hundreds of stick flicks per session, you’re naturally accelerating stick wear compared to someone playing Animal Crossing.
Keep your controllers dry. Sweat and moisture don’t directly cause drift, but they create a pathway for dust and grime to accumulate faster. If you’re gaming during hot weather or intense sessions, wipe down your Joy-Cons periodically.
Clean the stick edges regularly with a dry cloth or barely damp isopropyl alcohol swab every few weeks. This prevents debris buildup that can accelerate drift. It’s preventative maintenance, not a cure, but it genuinely helps.
Avoid extreme heat. Don’t leave controllers in hot cars or direct sunlight. Heat degrades the internal components and can soften the rubber on sticks faster. Room temperature storage is ideal.
Don’t let controllers sit unused for months. Contrary to intuition, controllers stored in closets often drift when you finally use them again. Regular, moderate use (as opposed to extreme use or no use) seems to keep sticks fresher. The lubricant inside needs occasional movement to stay effective.
Storage and Environmental Factors
Where and how you store your Joy-Cons matters more than most players realize.
Ideal storage: Cool, dry place (room temperature, 40-60% humidity). A drawer or shelf in your room is perfect. Avoid basements (moisture), attics (heat and cold swings), or anywhere with dust buildup.
With the Switch vs. detached: Storing Joy-Cons attached to the Switch in a case is fine for daily breaks. For long-term storage (weeks or months away from gaming), detach them slightly so they’re not under constant pressure. Extended pressure on the clip connectors doesn’t directly cause drift, but it can stress components over time.
In a protective case: A soft-lined carrying case protects against impacts and dust. Doesn’t prevent drift, but it extends overall controller lifespan by preventing accidental damage.
Humidity and dust: High-humidity environments (bathrooms, kitchens, damp basements) are terrible for electronics. Dust-heavy spaces (near vents, next to fabric) accumulate debris faster. If you live in a humid climate, consider keeping controllers in an airtight container with a desiccant pack when not in active use.
Temperature stability: Rapid temperature swings (like taking a cold controller from a car into a hot house) can cause condensation inside the casing, which then collects dust and accelerates drift. Let controllers acclimate to room temperature before extended use.
These aren’t game-changers individually, but together they can extend the life of a Joy-Con from 800 hours to 1200+ hours before drift becomes noticeable.
When to Replace vs. Repair
At some point, you need to decide: spend $35-45 on Nintendo repair, buy a new official Joy-Con for $75-80, or try a third-party alternative for $40-60?
Repair makes sense if:
- Your controller is still in warranty (free).
- You’re emotionally attached to it (sentimental, custom color, etc.).
- You want a guaranteed official Nintendo product back.
- The repair cost is under $35.
Replace with official Nintendo if:
- Your controller is out of warranty and the repair cost is surprisingly low.
- You absolutely need full feature parity (rumble, motion, wireless reliability).
- You want the peace of mind of a new one-year warranty.
- You have multiple drifting controllers and need quick turnaround.
Replace with third-party if:
- You’re paying $40-50 for a third-party Hall Effect controller, it’s often cheaper than Nintendo repair and you get better durability.
- You’re willing to sacrifice some features (rumble) for rock-solid stick reliability.
- You’re buying your second or third replacement and want to break the drift cycle.
- You play competitively and prioritize durability over official support.
For most players, if a single Joy-Con drifts and you’re out of warranty, buying a pair of third-party Hall Effect controllers (~$50-60 total) and giving away or recycling the drifted one is smarter than paying $35-45 for Nintendo repair. You’re getting more value, better durability, and a cleaner solution.
The Valve announces Steam Deck hybrid console has taken some market share from Switch for portable gaming, partly because its controller design hasn’t suffered the same drift epidemic. If you’re genuinely fed up with Joy-Con drift, that’s worth considering.
But, if you own multiple controllers and only one is drifting, DIY fixes (recalibration + cleaning) are free and sometimes work. Only move to repair or replacement if those fail. You might get another 3-6 months of use out of a recalibrated stick, which buys time before you need to spend money.
Conclusion
Nintendo Switch joystick drift is real, frustrating, and honestly, a design flaw that should’ve been fixed years ago. But in 2026, you’ve got multiple solid paths forward: DIY recalibration and cleaning, official Nintendo repair, or jumping to a third-party controller with genuinely better stick durability.
The takeaway: Don’t ignore it. A drifting stick only gets worse, and catching it early gives you more options and less urgency. Run the diagnostics, try recalibration, then make a choice based on your timeline, budget, and how much you value official Nintendo support.
If you’re buying your next controller today, consider Hall Effect third-party options like 8BitDo. If you’re sending your current one for repair, you’re looking at 2-3 weeks without it, plan a backup. And if you’re trying to squeeze life out of what you’ve got, regular cleaning and careful play extend things longer than you’d think.
The competitive gaming community has largely moved away from official Joy-Cons to Hall Effect alternatives. That’s not a coincidence. For Best Nintendo Switch Party Games for the Holidays and casual gaming, the built-in issues are tolerable. For serious play, they’re not. Whatever your situation, you now know exactly what’s happening inside that stick and what to do about it.