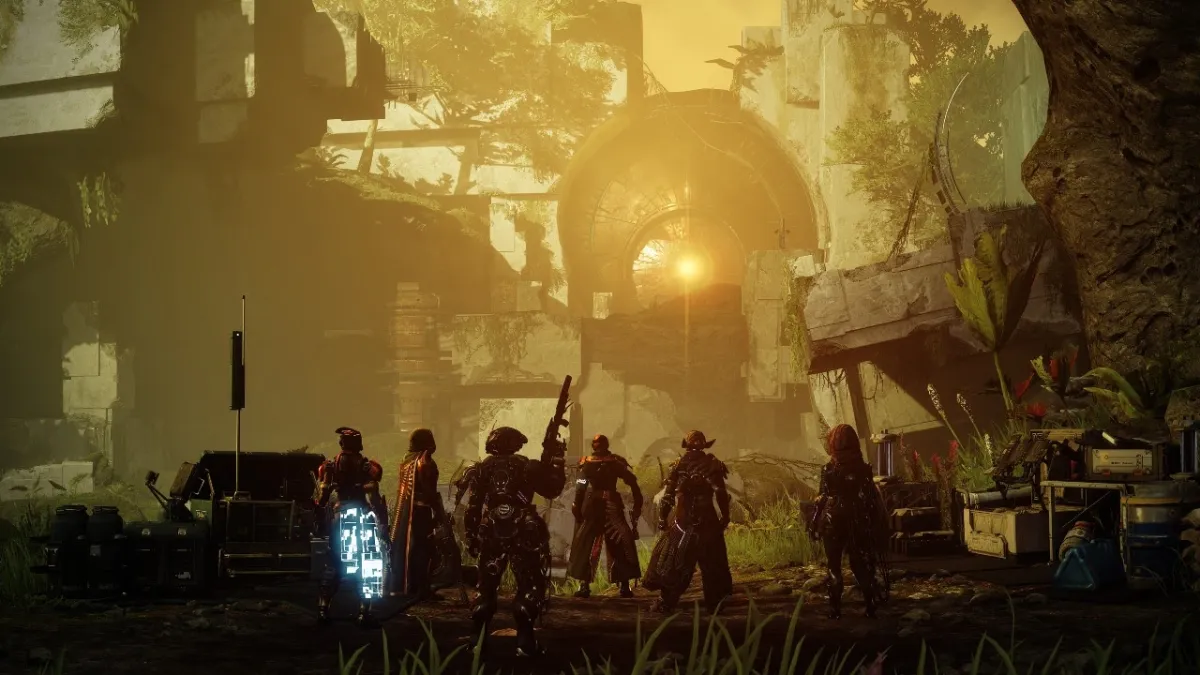
Welcome Guardians! If you’re looking for a comprehensive guide to the Destiny 2 Vault of Glass Raid during Season 15 – Season of the Lost you’ve come to the right place. Here you’ll find all the information needed to best complete the raid with your team, from suitable loadouts and the best strategies, to the exact steps required to complete each section of the raid. With this guide in hand, you’ll be storming into the Vault of Glass with confidence!
Overview of Vault of Glass
Vault of Glass is a raid that was initially released during the original Destiny and is now available on Destiny 2. It runs from 2014 to 2021 and marks the centennial anniversary of the launch of the original game, having been released as a major update in 14 different seasons over that time. The raid requires players to have an average power level of 1310 and teams composed up to 6 players must work together to traverse through multiple challenges, puzzles, and boss encounters while they search for the fabled Vault of Glass loot. The main objectives around this raid are based around solving challenging puzzles, working strategic loadouts with your teammates and tackling tricky boss encounters. This guide will provide advice about how to prepare for challenges during each phase of the raid, provide suggested loadouts for each stage, as well as provide tips for tackling some particularly testy bosses. With this help in hand you’ll be able to successfully progress through Guardian missions with confidence and concentration, ensuring a successful run into the fabled Vault Of Glass rewards!


Loadout
If you’re playing Destiny 2’s Vault of Glass raid this season, it’s important to have the right loadout for the raid. Having the right armor and weapons can make the difference between success and failure. In this guide, we’ll talk about some of the best loadouts for mastering the Vault of Glass, as well as some tips and tricks for succeeding in the raid.
Best Weapons for the Raid
When it comes to equipping your Guardian for a raid, the most important items to bring are weapons that can handle a variety of engagements. It is advisable to bring an assortment of primary, secondary and heavy weapons that are powerful enough to take down powerful bosses and hordes of lesser enemies. For primary weapons, depending on your team composition, you may bring auto rifles or pulse rifles. Pulse Rifles work best when you have Guardians close together that can benefit off each other’s damage output. Auto rifles however are good on their own as they have good accuracy, range and DPS compared to other primaries. For secondary weapons, sidearms or shotguns provide the most versatility and reliable damage output in raids. Sidearms shoot quickly with moderate accuracy but with only light damage output so aim carefully. Shotguns however provide a lot of burst damage at close range but may need longer reload times and reloading can potentially leave you vulnerable for an enemy’s attack. Finally for heavy weapons, rocket launchers mounted with homing missiles for added tracking are recommended for taking out large numbers of enemies easily and quickly destroying bosses with large health pools such as Atheon in Vault of Glass – Season 15 Season Of The Lost . The Gjallarhorn from the Iron Banner is also a reliable heavy weapon due its unique clusterbomb feature which sends micro-missiles towards enemies nearby its target’s center – great when faced up against swarms of Hive or Cabal foes while LightRifle projectiles work well against snipers skilled enough to pick you off at range easily when defending objectives across long distances many Guardians also find fusion rifles very useful in providing sustained damage at near-medium range offering great utility in shield breaking particular standard Centurion shields encountered often during the raid itself
Best Armor for the Raid
When it comes to the best armor for tackling the Vault of Glass raid in Destiny 2, there are a few primary considerations. You’ll want something that allows you to move quickly through the raid and taking advantage of perk combinations to suit your individual playstyle. Additionally, armor pieces with set bonuses can provide specific benefits that can help you maximize your performance in the raid. In Season 15, or the Season of the Lost, providing a good loadout for tackling this raid is not just about finding gear with powerful perks but also equipping pieces that allow you to access certain mods that will provide an edge during battle. Here are the best armor sets recommended for maximum performance on The Vault of Glass: -The Cursed Shall Perish – This season’s pinnacle set grants you increased recharge rates on your melee, grenade and class ability on each piece! Headpiece: +10% Improved Regeneration on Grenades; Arms: +10% Faster Ability Recharge Rate; Chest: +10% Faster Recharge rate on Melee; Legs: +10% Faster Recharge Rate on Class Ability -Exodus Down – This Shadowkeep expansion provides multiple modes shared across all pieces with respectable stat buffs and energetic upgrades – Headpiece: Impact Induction & Controlled Destruction mods; Arms: Reach Extension & High-Energy Fire; Chest: Scorch Cannon & Death Bloom; Legs: Fusion Crescendo & Scavenger’s Boon -Recklessness – The Recklessness set from Forsaken gives players additional weapon reload speed when damaged or shielded before killing an enemy – Headpiece: Accelerated Coils & Precious Scars Mods; Arms: Strike Synergy & Momentum Transfer Mods; Chest Migration Loop & Dynamic Sway Control Mod; Legs Willful Exodus & Flourishing Dance Mod
Best Mods for the Raid
Mods are a great way to enhance the effectiveness of your character in Destiny 2. With proper mods, your gear can do more than just add perks; it can outright increase your survivability, damage output, and other stats. Knowing which ones to equip for each situation is essential for completing the Vault of Glass raid in Season 15 Season of the Lost. Mods that are most effective when facing bosses and Champions in the Raid include Adaptive Mods like Protective Light, Protective Pulse, Unstoppable Pulse/Light/Hand Cannon, Reactive Pulse/Light/Hand Cannon and Overload Rounds. These will greatly reduce incoming damage and make you much hardier than ever before. Additionally, Elemental Mods such as Surge Eater (Arc), Fire Keeper (Solar) and Voidwall (Void) will help to give you an edge against enemies with those elements. With the right loadout setup using these powerful mods, you can really turn the tide against your toughest foes in this season’s Vault of Glass raid. Be sure to experiment with different combinations to get the best out of your gear and never forget about Alternator Rounds for Vex enemies! Lastly remember that Guardian Shield is always a powerful mod if you’re looking for extra protection against enemy Supers or explosions from Champions!
Best Perks for the Raid
When it comes to finding the ideal gear setup for the Vault of Glass raid, there is no one-size-fits-all approach that will work for every player. Instead, each raider should look to customize their loadout based on their preferred playstyle and the situation that they find themselves in. In order to achieve success in the raid, it is important to have gear with perks that help you in specific scenarios. To help make this task easier, we have compiled a list of some of the best perks that are beneficial when tackling this content. Light Perks: – Killing Wind: This perk grants a movement speed increase when you get kills with your guns or special attacks. – High Impact Reserves: This perk increases your special ammo reserves by a few shots which can be incredibly useful when in a tight situation. – Reactive Reload: Reactive Reload provides an automatic reload upon getting kills with weapons of a certain energy type. Heavy Perks: – Dragonfly Regalia: This perk increases damage from dragonfly explosions and grants bonus super energy from eliminating burning targets. – Rampage: Rampage grants bonus damage after stringing together kills which allows for quick clearing of enemies before diving further into the raid. – One For All: One For All allows teammates to score critical hits at increased rates and aims to solidify teamwork as an integral component within any fireteam’s strategy.
Strategies
The Vault of Glass Raid is one of the most challenging PvE activities in Destiny 2, and requires a skilled team of players to have a chance of success. It’s important for your team to have an optimal loadout and strategy in order to have the best chance of success. In this guide, we will be exploring some potential strategies to help you make it through the Vault of Glass.
Basic Strategies for the Raid
Completing the Vault of Glass Raid in Destiny 2: Season of the Lost can be challenging but rewarding. Before attempting the raid, it’s a good idea to understand some basic strategies that will help make your experience successful. The first tactical strategy is team-building. To succeed in the Vault of Glass, you must have a cohesive team delivering coordinated and decisive strikes. In addition to building a strong team, all participants should have proper loadouts and weapons for their class. Taking the time to customize your Loadout and individual class abilities is essential for success. Next comes strategy for each encounter and location within The Vault itself. Each area will have unique enemy types and loot opportunities adding complexity as you progress through this massive raid to achieve victory. We recommend achieving objectives in order but paying attention to details on when enemies spawn or appear, as well as possible environmental mechanics like platforms or towers that require activation or teleportation in order to proceed throughout the Raid’s different areas and stages. Finally, remember that practice makes perfect (or at least easier). Taking time to become comfortable with each area prior to tackling them in succession can help ensure success if done correctly. It’s best to approach each skirmish systematically while focusing on objectives such as eliminating enemies or locating caches so that everyone understands what needs to be achieved in order for your teams victory over The Vault of Glass!
Advanced Strategies for the Raid
The Vault of Glass raid is one of the most difficult and challenging activities in Destiny 2. This expansive raid offers six sections full of boss and leader challenges as well as several optional rewards to choose from. In order to successfully complete the raid, you will need to utilize advanced strategies like preparation and coordination. Here are some helpful tips that can help you better prepare for the fight: 1. Choose Your Loadouts Wisely – Knowing what weapons and gear to bring with you is essential for success in the Vault of Glass. Make sure your team knows what loadouts are best for each role in the raid, so you can come prepared for any situation. 2. Utilize Special Abilities – This is especially true when it comes to your Guardian subclass abilities—some attacks require more than just shooting at enemies, but use Warden’s Renewal or Night Stalker cloaking abilities can get your team an added edge during certain encounters. 3. Divide & Conquer – Some sections of the raid require split-second coordination between two or more teams; assign roles to all participating Guardians and make sure everyone knows exactly how they’re supposed to coordinate their movements within their assigned areas before attempting a section. 4. Know Your Enemy – Before engaging, be sure that everyone in your Fireteam knows exactly what effects particular enemy abilities have so that no one gets overwhelmed or caught off-guard halfway through a fight; don’t forget about protecting yourself from gun fire towards your party as well! 5. Rely on Stealth & Strategy – While guns blazing might work from time-to-time, relying on stealth and strategy is often key when attempting a difficult section or encounter; whenever possible try using techniques like coordinated Guardian changes, positioning yourself behind cover then surprising enemies with overpowering hits or using sound tactics like pulling out specific enemies at a time rather than attempting an all-out assault straight away! By considering these tips before setting out on your adventure into the Vault of Glass, you should find yourself better prepared for whatever this massive undertaking throws at you—good luck Guardian!
Boss Fights
The Vault of Glass raid is the most difficult raid in Destiny 2 and the most difficult battle is against Atheon. Atheon is a time elemental that is located in the heart of the Vault of Glass. To successfully defeat Atheon, you must understand the mechanics of the fight and have the right loadout to counter his attacks. In this guide, we’ll go over the mechanics of the Atheon boss fight and the best Vault of Glass loadout to defeat him.
Atheon
Atheon is the first boss in Destiny 2’s Vault of Glass raid. It is a Vex-Hybrid warrior designed to protect the Vault of Glass and enforce its will as an envoy of the Vex Collective. Atheon has two phases, with each phase requiring a different set up and strategy in order to defeat it. The first phase requires all eight players in the fireteam to split into two groups and complete the portal-jumping puzzles within three minutes. When this is complete, each group must stand on their respective plate at opposite ends of the arena until Atheon transitions into his second phase. In his second form, Atheon will send out waves of enemies for each player to defeat before moving onto to shooting at him with energy cannons found around the edges of the arena. Depending on availability, each team member should use either a Linear Fusion Rifle or a Rocket Launcher to deal significant damage against Atheon during this phase before transitioning back into dealing with his summoned enemies throughout the course of battle.
Templar
The Templar is the second major boss of Destiny 2’s Vault of Glass raid. He is an ancient Vex machine that guards the Vault’s entrance and will have to be vanquished before you can access the interior of the Vault. Set in a massive arena, this fight features three phases that require coordinated fireteam actions. During the first two phases, your group will face waves of adds which must be defeated before focusing on Templar. When enough adds have been cleared and damaged dealt to Templar himself, he will move into phase three which is where the real battle begins. Templar attacks with a variety of powerful abilities; using a combination of Arc based attacks (Laser Beam and Thunderbolt) and projectiles from his Shield Drones – each equally deadly as you attempt to damage him. You will need to stay nimble on your feet to avoid overwhelming damage as he rotates between his shield drones – all while avoiding other enemies in the playing field. Due to the complexity involved in defeating Templar, it is suggested that you bring a competent loadout comprising a mix of weapons (for example Kinetic Auto Rifles and Energy Snipers) as well as an excellent Guardian Fireteam who understand what’s required in order to achieve success here. Templar may appear daunting at first but with enough practice you too can defeat this ancient Vex machine!
Gatekeeper
One of the most difficult bosses found in the Vault of Glass is the Gatekeeper. As one of the three main bosses, defeating it is crucial to clearing the raid. To be successful in this encounter, you need to understand its attack pattern and how it works. The Gatekeeper can be found at the end of Vault of Glass just before entering into The Black Garden. When engaged it will spawn four “anomalies”, or add-on creatures that must all be defeated before the boss can be killed. Each one requires a specific strategy, but they can all be killed using consistent weapon, player skill and tactics. To defeat each anomaly you’ll need to use a specific loadout with effective weapons like Void Exotics such as The Trespasser or Judgement as well as weapons with added damage types such as Arc Mods for Solar damage or Grenade Launcher for heavy ordinance attacks against Unstable Anomalies. Additionally you might want to switch between Heavy Weapons and Primary Weapons depending on the type of enemy encountered during a Hard Mode battle against stronger foes such as Warden Kruptos who are immune to certain weapon elements due to their armor and shields. If that wasn’t enough, Cold Heart and Felborne Warlocks will also teleport around making dodging them much more difficult on Heroic mode playthroughs! The Gatekeeper fight itself is composed of four main steps which involve each Anomaly being defeated followed by a boss phase featuring overlapping health pools divided between two Guardians each with different weapons sets composed of Heavy Weapons ammo increased firepower and primary ammo used to penetrate through tough armor shielding while dealing Damage over Time effects when necessary depending on random drops from defeated enemies encountered in other areas within the Raid instance.
Templar
The Templar is the second boss fight in the Vault of Glass raid. He is encountered in an enormous chamber with a Vex-made door at the end that seals shut when players enter the arena. The raid must defeat a number of lesser enemies to activate several plates, which in turn causes a large glyph to appear above the door. When activated, the glyph opens up and reveals Templar himself. Templar has three main attacks: a standard light beam attack, which deals damage to anyone it touches; a more powerful heavy beam attack which is lethal but can be avoided by standing in one of two spots near Templar; and a powerful shockwave attack that players must avoid either by running away from it or jumping into one of four special pits located around the arena. In addition, Templar will periodically activate several shields around himself which must be broken down by shooting four weak points that are visible when his shields are on. In order for damage to be done to Templar himself, each shield must be destroyed before proceeding onto the next shield – so long as at least one person remains focused on attacking these weak points, success is possible! Additionally, there are several plates around the arena that provide buffs and give damage bonuses when everyone stands upon them for a short period of time – taking advantage of these plates can help significantly when attempting to take down this formidable force.
Oracles
The Oracles is a boss fight encountered within the Vault of Glass raid in Destiny 2. The Oracles are Vex constructs found deep within the Vault which will lock and unlock portals, hindering your progress further in. To defeat the Oracles, Guardians must traverse their way through the Vex portals, utilizing them to progress further into the raid. As they traverse through the portals, they will need to eliminate one of the two oracles guarding each portal — shooting down both will negate any enemies progressing through it. Once all four oracles are destroyed, each portal will be permanently unlocked. This encounter is essential to understanding how each portal within the Vex gate network works and how to use them in order to progress further into the raid. Utilizing powerful weapons such as Sniper Rifles and Shotguns with special abilities such as Zen Moment or Slideways can make this encounter quicker and more efficient for Guardians who have unlocked these special abilities from various Quests or Rotator Missions back at The Tower.
Atheon
Atheon is the final boss of Destiny 2’s Vault of Glass raid. He is a powerful Vex Minotaur tasked with safeguarding the Vault and maintaining the Vault’s greater timeline structure. Atheon can be found at the end of The Gatekeeper, a lengthy raid which culminates with a battle against this imposing foe. Defeating Atheon can be a lengthy process, as your fireteam will have to coordinate their movements, utilize precise weaponry and most importantly survive his onslaught of attacks. Each member of your team should equip themselves with precise weapons such as Sniper Rifles, Shotguns, Rocket Launchers and Fusion Rifles – these types of weapons deal increased damage to Vex targets such as Atheon. Heavy weapons are also helpful when fighting Atheon – a well placed Super attack can greatly reduce his health bar. Atheon will summon time gates throughout the battle which will summon even more Vex enemies that must be dispatched quickly before moving on to dealing damage to Atheon himself. His various attacks includes a shield stun that renders every one in range unable to shoot or move for a short period of time and repeatedly teleporting shielded plates around the map which must taken out before atheon himself becomes vulnerable again for damage dealing. Having multiple players continue dealing chip damage on him during these phases can help greatly reduce the overall amount of time required for defeating him in addition to avoiding his various attacks immunity periods Equipment-wise it pays dividends to team up which players running exotic pieces such as Imperials Robe (enhances Supers) or Outbreak Perfected (Trace Rifle) as they can showcase massive DPS potential against moderate enemy mobs throughout different fight phases ensuring success against Atheon
Conclusion
Vault of Glass is one of the most challenging activities in Destiny 2. The mission requires careful planning, efficient team communication and coordination, and powerful loadouts to succeed. Completing this mission can offer rare rewards, and the Season of the Lost offers an ideal time to take on this challenge. In this guide, we’ve gone over the basics of how to approach the mission, as well as some of the best loadouts for success. With all this information, you should be well prepared to complete the Vault of Glass and reap the rewards!
Summary of the Raid
The Destiny 2 Vault of Glass raid is an eight-player activity set within a Vex-controlled relic deep beneath the surface of Venus. This raid returns from the first Destiny game to give players an extra challenge with new puzzles and landscapes to explore. The raid consists of six main encounters culminating in a final boss battle against Atheon, Time’s Conflux. Vault of Glass has some extreme complexity due to its array of rooms, puzzles and enemies, so the proper loadout for your Fireteam is essential for success. Completing the Vault of Glass is no easy feat – it requires coordination and a finely tuned team composed of players with knowledge and experience in Raids as it contains one very difficult final boss. With that said, putting together a good loadout will make this activity much easier as it allows you to take advantage of weaknesses and strengths specific to each enemy type. Preparation is key — make sure you have the right weapons and armor before entering this dangerous relic! Good luck Guardians!
Tips and Tricks for the Raid
The Vault of Glass Raid in Destiny 2 requires a good amount of practice and skill from its players. To help you get started on this challenging activity, here are some helpful tips and tricks that can help you succeed: 1. Utilize your Loadout – Make sure you have a strong loadout with the right weapons, armor pieces, mods, and more that will make bosses easier. Having a well-balanced team is essential for success during the raid. 2. Know Your Enemies – Take the time to study or evaluate your opponents’ attack patterns so that you know how to avoid their damage. Be mindful of any AoE (Area of Effect) abilities which can quickly clear out your entire team if you’re not careful! 3. Stay Together – It’s important to stay together as a team when progressing through each section of the raid to minimize distractions or deaths caused by stragglers being left behind. Make sure to communicate well with your whole team! 4. Exploit Weaknesses – Every boss has their own set of weaknesses so use this knowledge to exploit them when possible. Focus fire on one enemy at a time if you want faster results since this will eliminate them faster than dividing your firepower among multiple enemies at once. 5. Level Up – Make sure everyone in your party has reached the recommended level of power for the raid difficulty before starting! This will make sure everyone is evenly matched and has access to stronger abilities and equipment that can help tackle tougher encounters quickly.